Thinking of kickstarting a streaming career but not sure where to start? Don’t worry, we’ve all been there. Beginning your journey can feel like an avalanche of technical requirements and unwritten rules, which is why we compiled a few tips and tricks to get you started!
Do note that some of these tips apply across other platforms like YouTube and Facebook, but we’re mostly going to focus on Twitch for this article. Now, let’s get into it!
1. Choose a live streaming program

Before you begin streaming, you first have to choose a live streaming software. The most popular options are OBS (Open Broadcaster Software) and Streamlabs. Streamlabs is the more user-friendly option and takes less time to set up, but it is also uses a lot of CPU power which isn’t recommended for older computers.
On the other hand, OBS is a lightweight and stripped down alternative that is used by most streamers and video content creators. It isn’t as beginner friendly and might confuse you at first, but thankfully there are plenty of online guides to help with that.
2. Set up your Scenes

Once you’ve decided on your live streaming software, you can begin setting up your scenes. Scenes are a useful way to control the narrative of your streams, while keeping things visually interesting. There are plenty of interesting things you can experiment with scenes, but we would recommend newbies begin with these three: Starting Soon, Be Right Back, and your Main Scene.
Your Starting Soon and Be Right Back scenes are usually a static image or looping video that you can swap to while preparing to begin your stream, or while taking a short break from streams. Meanwhile, your Main Scene is where you showcase your stream activity, such as gameplay or crafting.
3. Add on basic stream alerts

Stream alerts are images or messages that appear in real-time when your audience interacts with your stream. One of the most common stream alerts is a New Follow alert, which acts as a thank you to new followers on your channel. This can be a helpful show of appreciation as you work towards that coveted Twitch Affiliate status.
You can set up stream alerts natively in your Twitch Creator Dashboard under the Alerts tab. If you’re not a fan of the native Twitch Alerts, you can also check out websites like Streamlabs and StreamElements. Just remember to paste the Browser Source into your live streaming software, otherwise it won’t appear on stream!
4. Start a follower goal

One of the conditions to becoming a Twitch Affiliate is hitting 50 followers on your channel. Setting a Follower Goal encourages potential viewers to help you achieve that goal. You can even paste the Browser Source in your live streaming software to display your Follower Goal on stream.
5. Decorate your Twitch panels

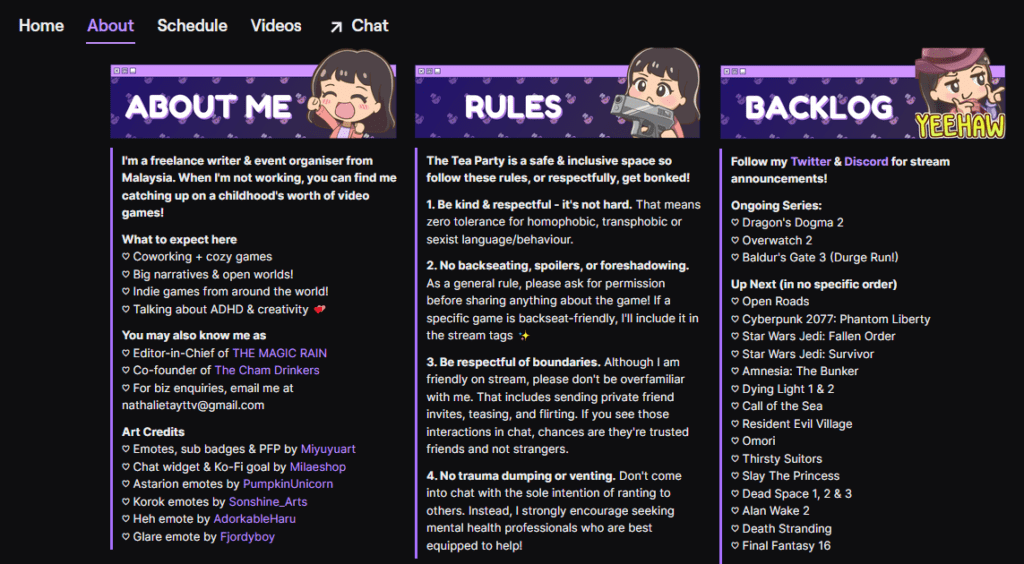
One of the most overlooked aspects of every new channel, Twitch Panels refer to the About tab on your Twitch channel. Panels are the best place to give potential viewers an in-depth introduction to you and your content. Seasoned streamers also use their panels to share channel rules, streaming schedules, and even a list of games.
6. Add relevant stream tags

You’re almost ready to stream now — just one more step to go! Adding relevant tags to your stream is a great way to boost organic discoverability. You can add tags in the Edit Stream Info option under the Stream Manager tab in the Creator Dashboard. For starters, we’d recommend tagging your country, as many streamers prefer to raid others within the same country or timezone.
What guides would you like to see next? Let us know in the comments below!


